If I could choose one specialty in the sign industry, it would be vehicle graphics. I thoroughly enjoy working on eighteen-wheel semi trailers, and we always strive to create and install the cleanest look for our client’s advertisement.
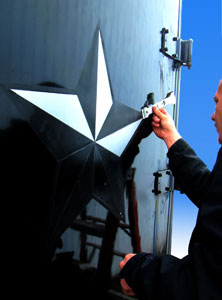
For this project, we were furnished with a very used black-painted semi trailer. The trailer still had the original vinyl graphics welded to the trailer surface.
The removal of these graphics was challenging to say the least. Our arsenal of removal techniques included an electric heat gun, several Lil’ Chizler plastic scrapers, a couple of gallons of mineral spirits, and fifteen rolls of paper towels.
Seeing what was ahead of us, we began immediately by removing all the existing graphics from both sides and the back doors of the trailer.
Progress turned extremely slow, so we ended up changing our attack plan.
Since we would be installing several four-by-eight-foot aluminum panels to both sides—which would be covering a large portion of the unwanted, no longer applicable graphics—we left the original letters adhered to the trailer surface (as these would be covered by the aluminum panels). This shaved a few hours off the project and made me and my crew equally happy.

We then attached 0.063 white aluminum sheets to each side of the trailer.
Each sign consists of five aluminum panels. We began from the rear of the trailer and worked forward with our aluminum sheets and pop rivets.
Taking the first panel up the side of the trailer, we drilled a hole in the upper left-hand corner. Carefully holding the panel in place, I inserted a pop rivet into the drilled hole, and after a few pumps on the handle, the first rivet was in place.
The next rivet was installed forty-seven inches to the right of the left-installed rivet.
From there, we drilled a 1/8-inch hole across and down each side of the four-by-eight panels, resulting in forty rivets per aluminum panel.
After all five panels were securely fastened to the sides of the trailer, we applied 2-mil high-performance graphics printed and laminated in-house to both sides.
We started with the full-color logo featuring the State of Texas image inside a globe. We positioned it in place and applied a horizontal tape hinge down the middle.
From there, we folded the right-hand side of the decal over to the left and carefully cut the liner paper with a sharp X-ACTO® knife.
When this portion of the decal was exposed, we quickly squeegeed the decal down to the aluminum panel surface.
Next we repeated the process for the other side of the decal and removed all transfer paper.
We then installed a blue divider line to separate the TGE graphics and the “Industrial Services” letters, which were cut from Oracal 751C High Performance Cast yellow vinyl. To add some separation, we applied a 1.5-by-48-inch blue horizontal band that worked out great!
The client was thrilled with the finished product. In fact, I was too. Now I have yet another product to offer similar industries that use aluminum panels covering the sides of their semi trailers.
By Mark K. Roberts, who has been creating commercial signs in Houston, Texas for a couple of decades. Visit his Web site at www.theintersigngroup.com.


