
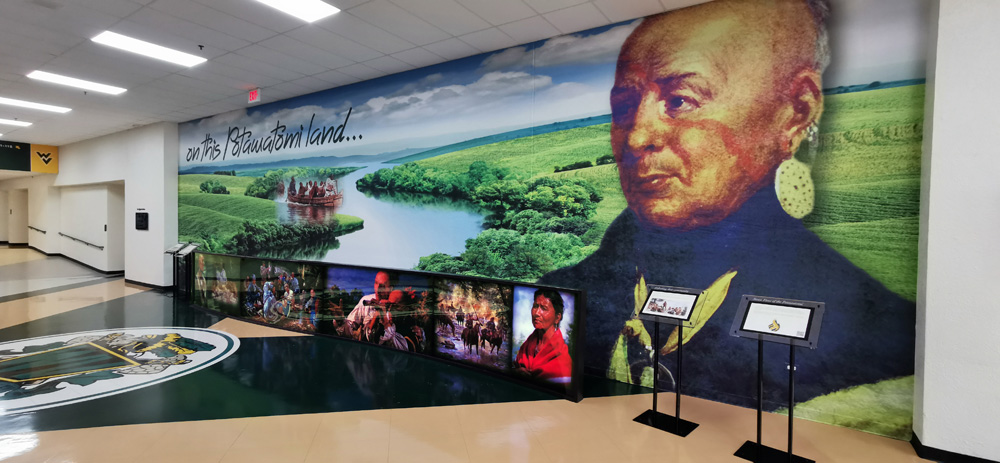
A high school in Aurora, Illinois recently wanted to initiate a culture change at its campus and replace a long-standing mural that featured a more Hollywood-centric view of Native Americans with one presenting a more representative culture who actually lived where the school is located.
The end-result is a forty-five-foot-long mural display aptly named “On This Potawatomi Land…” and featuring realistic imagery and iconography related to the Potawatomi tribe in the area. You can even call this endeavor an exhibit as it also includes backlit panels in front of the mural and custom-designed pedestals that give the viewer more detailed information about the peoples who lived in the area centuries ago.
Digicom Imaging, Inc., of nearby Plainfield, was in charge of designing, fabricating, and installing this particular exhibit for the high school—and for good reason. This full-service sign company has been in business for twenty-plus years now, and they have a highly regarded reputation in the area for creating signage that captures (and exceeds) a client’s vision.
Owner Ryan Loft says that his company prides itself in tackling projects that extend past their comfort zone. They have the equipment and knowledge to create many types of displays—from large murals to backlit panels illuminated with LEDs. (Note: If they don’t have the tools needed in-house for certain signage, they will also partner with other vendors for that fabrication process.)
Digicom Imaging already enjoys a relationship with the school district, designing and building signage of all kinds for many of their campuses, so they were an ideal fit for this project. Loft says that they view getting approvals from administrators as a partnership. “We might bounce some numbers off of them and describe what this amount could include,” he explains, “and we go back and forth until what the client envisions and what we will charge blend together.”
The company began with a site survey, which Loft stresses is always an important step to any successful project. They always cover most of the bases (taking exact measurements, understanding the various substrates they will be working with, etc.) to make sure they don’t end up with any surprises along the way. “However, as any sign shop will tell you, surprises are, in most cases, part of the job,” says Loft. “We just try to deal with them, come up with solutions, keep everyone informed, and move on.”
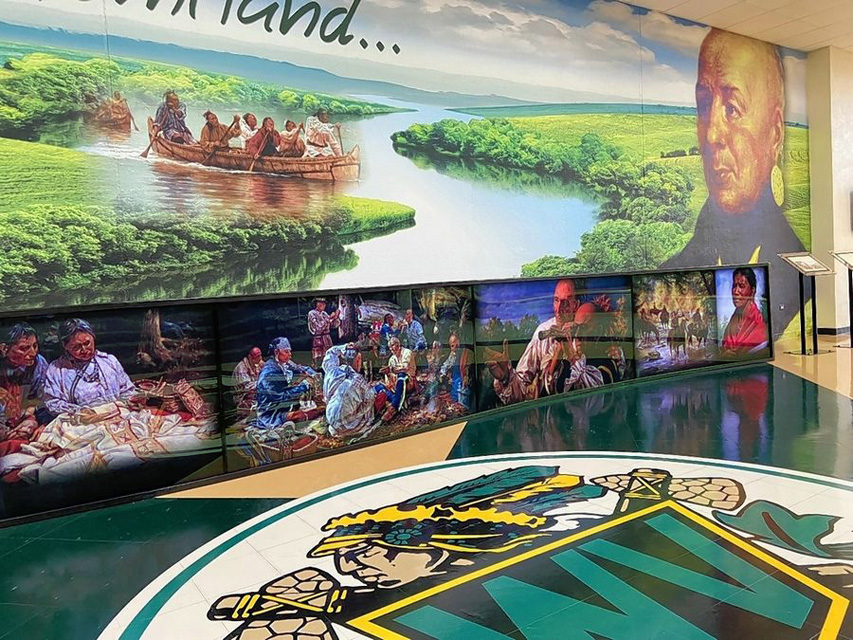
This ended up being a very challenging and intensive project for Digicom Imaging, because of its scope. They ended up designing all aspects of the display, and they even created a new crest for them.
The initial phase involved plenty of legwork on the part of the sign shop. “We first had to do a lot of research into the First Peoples who settled on the land where the school is now located,” details Loft. “We contacted museums and scoured the Internet for documents. We spoke with members of the Potawatomi tribe and tried to get a sense of who these people were, where they came from, and what happened to them over the centuries. It was truly a mind-expanding quest.”
The images used in this display came for a variety of sources. “Online services such as Shutterstock and Getty Images provide a multitude of images that can be purchased and used commercially,” explains Loft. “If we can’t find images using those services, we sometimes reach out to book publishers in an effort to obtain images that might serve us well in a project.
“Once we have an image in mind, we take a look at the resolution and see if it might work for our project.”
Digicom Imaging then uses tools such as Photoshop and Illustrator to manipulate the image in such a way to make it useful for their purposes. “After any manipulation, we always test a portion of the image at the size it will eventually end up being, using our printers to make sure it will meet the quality criteria we expect,” says Loft.
Lots of engineering went into this project. Digicom Imaging figures that they used every machine and device in its shop for it—everything from their large flatbed printer to their 3D printer.
The company started by producing a diorama of their vision for this project via a 3D printer to show school administrators what the final piece would look like.
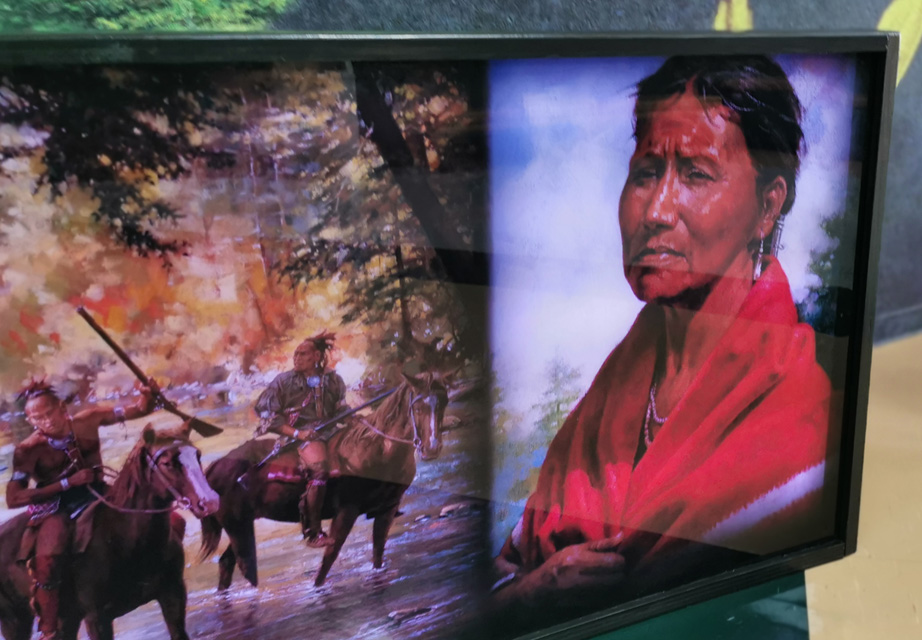
Twelve panels for the mural were produced on an HP 365 printer. The company printed the panels on 3M 8624 vinyl and used a 2-mil cast matte laminate to protect the image.
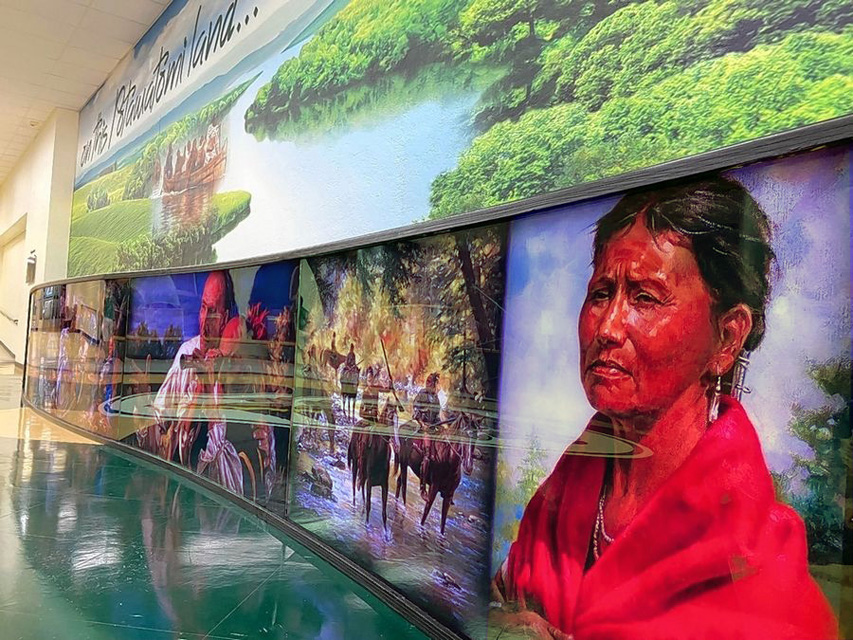
Meanwhile the backlit portion of the display was created with a gentle curve to coincide with the flow of the river. “It was no small feat to create a freestanding display that measures twenty-eight-feet-long-by-four-feet-tall where the panels needed to be slid into channels that were CNC-routed into the wood,” he states.
Digicom Imaging needed a wood that would stand up to any moisture that might be present on the floor. “Since facilities routinely clean and wax the floor, we wanted something that could hold up in that environment,” says Loft, noting that they also wanted this structure to be solid.
With these requirements in mind, the shop used 2-inch-by-10-inch-by-8-foot pressure-treated pine.
Their next challenge involved having to CNC-route this wood in the shape of a gentle curve as well as placing slots in the boards to accommodate four-by-seven-foot Lexan panels being slid into them.
“We had to use special router bits to cut the 1-1/2-inch-thick pressure-treated wood and a special hold-down system so the lumber would not move when routing,” explains Loft. “At the same time, we needed a system that could join the pieces of cut lumber together so there would be no apparent seam, as well as a post system that could join the upper and lower sections of the twenty-eight-foot-long rail so, when we slid the Lexan panels in place, they wouldn’t bind.
“We wanted the panels to be able to be removed, if the school ever wanted to change out the images in the future.”
In an effort to add some “pop” and “depth” to the display, Digicom Imaging opted to backlight them with LED.
Digicom Imaging always planned on printing the Lexan panels on their flatbed printer. Since they wanted it to illuminate well with the LED components, they used the second-surface application to give them a little added density. “While we could have printed them on PVC or white Lexan, the choice to make them backlit was a good one, since they almost looked 3D when lit,” says Loft.
The LED modules are located only three inches away from the prints, so the sign shop backed up the printed image with some translucent vinyl to reduce any hot spots that might be caused by the LEDs’ close proximity. “Actually everything worked out exactly as we had planned,” confirms Loft. “The images looked stunning!”
They used a low-intensity LED source typically used for under-cabinet lighting because they didn’t want the panels to be too bright and either take away from the mural behind it or make it a possible distraction within the school. “We didn’t want it to look like you were walking through an airport,” comments Loft.
The front-standing pedestals were formulated from photos that Digicom Imaging saw on various web sites, but Loft admits that even the images they came across didn’t quite have what they were looking for on this project. “Some were too large, and some were too small,” he says invoking Goldilocks, “and some of them just didn’t have the right mix of a modern feel and a ‘wow’ factor.”
The sign company ended up creating these pedestals out of laser-cut acrylic, powder-coated aluminum, and steel, as well as an integral frame that surrounded the art and text that had been printed on their flatbed printer.
They brought back their 3D printer to fabricate the black plastic connectors used on the acrylic pedestals holding the two pieces of acrylic together at the corners, as well as to produce black plastic caps that hide the bolts used to secure the pedestals to the floor.
The 14-by-45-foot mural took two days for the shop to install, while the 4-by-28-foot front panel display took five days to install. Part of this was due to staining and poly-coating the wood prior to the installation. “It was also a process to get all the wood sections to fit together without a noticeable seam,” remarks Loft.
Since the structure itself was freestanding, it had to be secured with concrete embedded bolts, sixteen aluminum posts, and a matching top section that had to be a mirror image of the bottom section. Eight panels had to slide into the routed slots without binding. “It took a little extra sanding, but in the end, everything worked well,” says Loft.
This project has been a boon for the community and generated plenty of exposure. The local newspaper even featured it on their front page. “And the students at the school have a sense of pride, in regards to learning about the origin of the school’s name as well as the first people who settled on this land,” concludes Loft.
—Jeff Wooten


