

Have you thought about becoming an expert in ADA (Americans with Disabilities Act) compliant signs and environmental graphics? It’s a great way to make your products and services more valuable to your clients.
Interestingly not many sign shops offer ADA signage services.
This means you have a big opportunity to provide products that will help your community while helping you stand out from your competition and grow your business.
The key points to consider when it comes to ADA-compliant signage projects are fairly similar to any other sign project. Once you master the basic requirements, it won’t be long before you’re a pro.
 Design
Most ADA sign projects are typically commissioned by architects who care a lot about how your potential sign designs will match their vision for the property.
The creative part of the project will rely heavily on the architectural plans, so be sure to ask for a complete set of plans upfront, including conceptual building elevations, site layouts, and floor plans. These plans will help you decide which elements to use in your sign designs, how many signs you need, and where to install them.
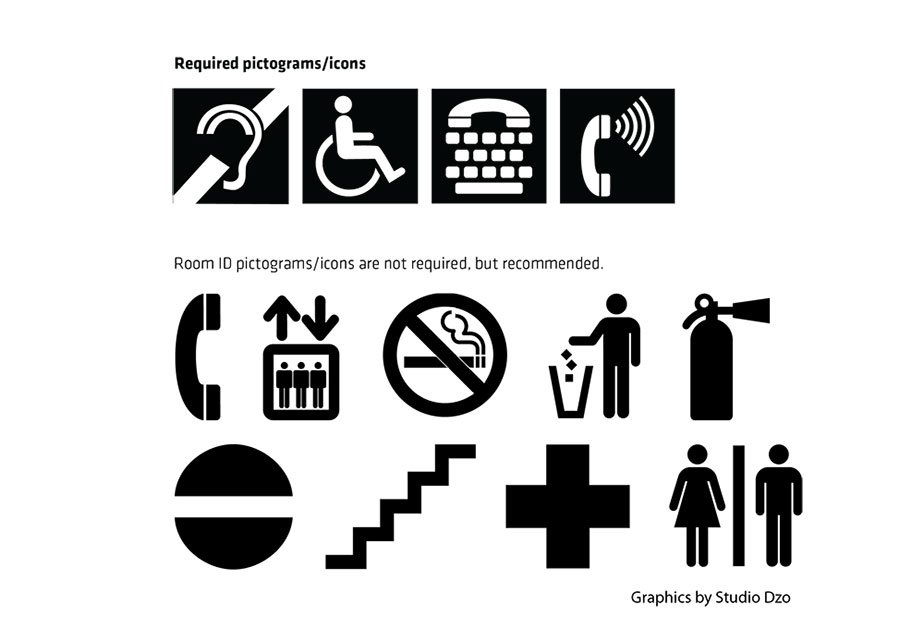
Once you’ve figured out the creative components of the project, you’ll need to think about using materials and finishes that meet ADA standards (see 703.2-7 Design Standards of the ADA compliant signage guide).
While the following isn’t a full list, here are some important things to consider for your project:
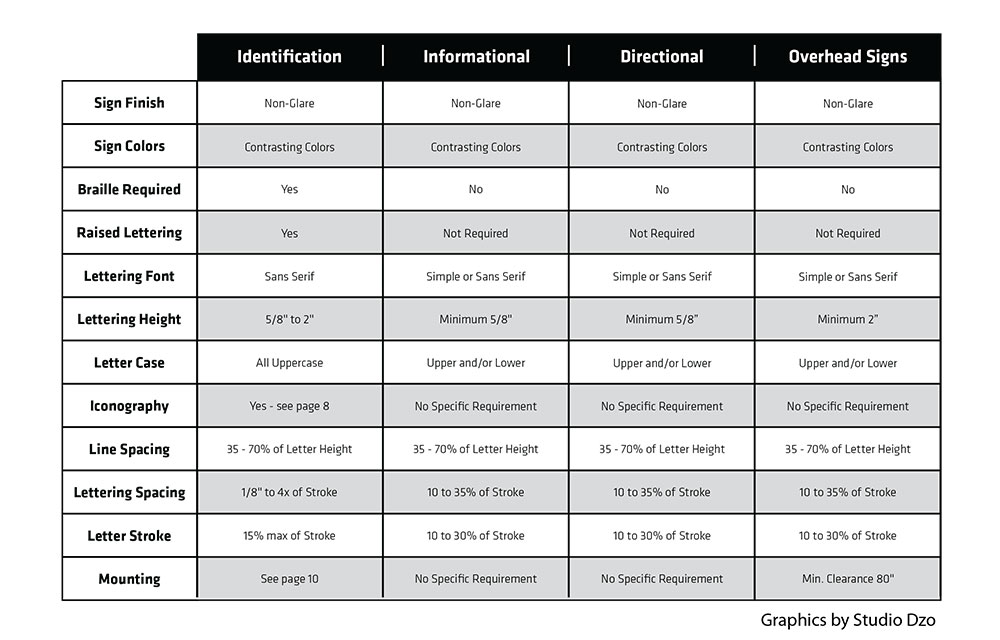
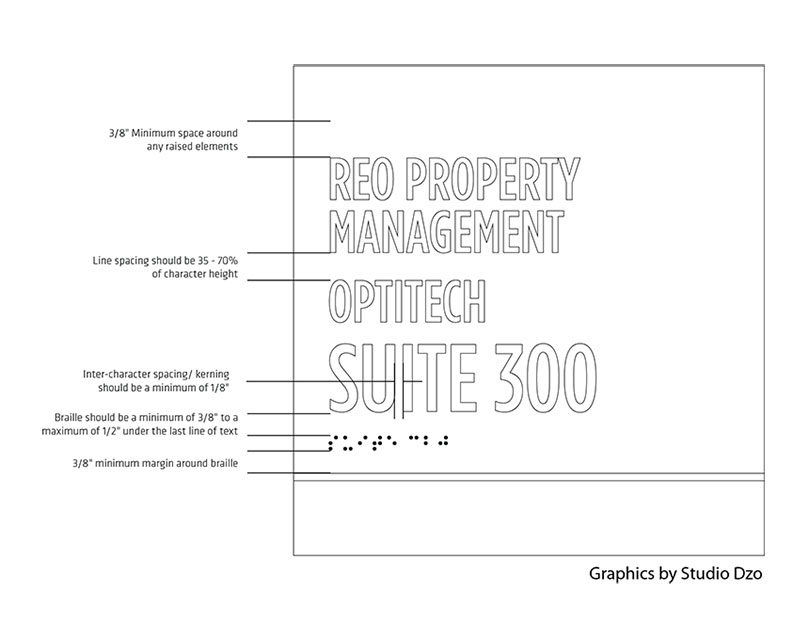
Text Size: Signs must have text that is between 5/8-inch and 2 inches in height. The text should be raised by at least 1/32-inch.
Braille: Signs indicating permanent rooms must include Grade 2 Braille. Braille translation should directly match the sign’s text and be placed underneath it. For signs with multiple lines of text, the Braille should be below all the text.
Font: Text must be in all capital letters and in a sans-serif font. It cannot be italic, script, bold, or decorative.
Finishing: Signs should have a non-glare, matte, or eggshell finish. Reflective or glossy finishes are not allowed. Textures on signs should be minimal to ensure easy reading by touch, and there should be no sharp or abrasive edges.
Contrast: Tactile lettering on ADA signs must have a contrast ratio of 70 percent with the background. This means using dark letters on a light background or light letters on a darker background.
 Fabrication
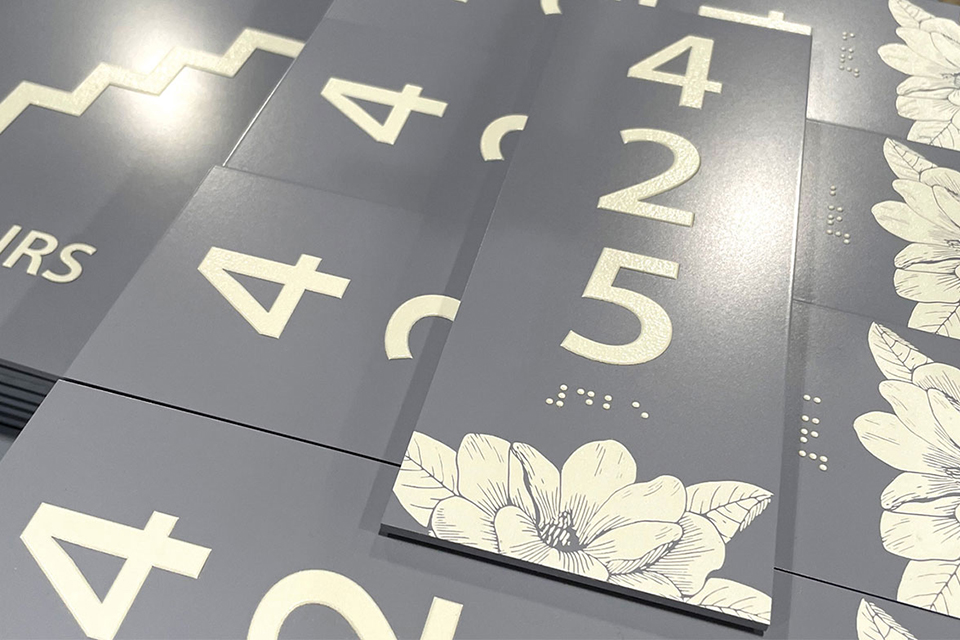
Common ADA materials include high-contrast acrylic, photopolymer, or metal.
Ensure that the materials are durable and can withstand environmental conditions. Ask for samples and recommendations from your local supply representatives to ensure you are using the correct materials for the job.
Equipment and tools needed for your shop to produce ADA signage can get pricey, so don’t feel you need to add them all at once.
When you’re ready to take the plunge, here is a list of tools to consider:
Computer-Aided Design (CAD) Software: CAD software is employed for creating precise design layouts—including text, Braille, and symbols—to meet ADA standards.
Braille Embosser or Braille Pen: A Braille embosser is essential for accurately creating raised Braille dots that meet Braille specifications. You can also route the placement holes for the Braille beads and apply them using a Braille Pen.
Digital Printing Equipment: For signs that incorporate printed graphics or images, digital printers can be used to ensure high-quality and consistent output.
CNC Router or Engraver: These machines are crucial for precision cutting and engraving of tactile lettering, Braille, and other elements on signage materials like acrylic, metal, or plastic.
Laser Cutter: This device allows for cutting the smallest pieces of dimensional letters and logos required in ADA-compliant signage, as well as engraving of customizable promotional products.
Vinyl Cutting Plotter: This equipment is useful for cutting vinyl graphics, which can be applied to signs for added information or branding.
Paint Booth and Finishing Tools: Tools for applying non-glare, matte, or eggshell finishes, as well as contrasting colors, are important for achieving the desired appearance and compliance with ADA standards.
Keep in mind that the specific equipment you need may vary, depending on the type of signage projects you sell. It’s important to invest in high-quality equipment and stay updated on ADA guidelines to consistently produce compliant signage.
I highly recommend interviewing several high-quality ADA-compliant wholesale manufacturers and asking for samples or visiting your shop for educational purposes. This is a great way to get started without the huge investment of expensive equipment.
 Installation
There are a few key things to keep in mind, but the most crucial is following the ADA placement guidelines.
City permit inspectors are very strict about ADA signage installation, and even a slight error in placement can lead to failing your final inspection.
Measure and Mark: Measuring from the floor, mark forty-eight inches up and eighteen inches from the handle-side of the door frame. The sign should be positioned center of the eighteen inches. The baseline of the Braille should be forty-eight inches from the floor.
I recommend building a spacer template using wood boards that allows you to place the signs in the exact spot every time without having to measure for each door.
Add Adhesive: For application on drywall or brick, apply non-corrosive silicone to the back of the sign. Be sure the silicone is applied in the middle of the sign panel, away from the edge of the sign so that the silicone doesn’t show on the side of the sign.
For application on glass, clear silicone is optimal (apply a vinyl backer on the inside of the glass behind the sign to hide the back of the sign).
Position and Apply: After one last check to ensure your positioning is perfect, press and apply pressure to make sure your sign is secure.
Apply a small piece of painter’s tape to the sides of the sign, avoiding graphics (if possible) to allow the silicone to dry.
Clean Sign: Gently remove the painter’s tape after several hours. Use a lint free micro-fiber rag, along with gentle soap and water, to leave your signs fingerprint and dirt free.
Conclusion
Becoming an ADA-compliant sign supplier is easier than it may seem. Just get to know the requirements, start with small projects, partner with a reliable wholesaler, and gradually offer these signs to your clients.
Soon enough, you’ll be handling big projects, offering valuable signage, and making good profits.


