
My name is Steve Kolacz, and I am with GrafiXhouse Design Studios. Our artist-driven shop is located in Garner, North Carolina (just outside of Raleigh) in an old First Citizens Bank building that we renovated. We have three professional artists with degrees in fine art and advertising on-staff, and, here at GrafiXhouse, we do everything from concept to design to install. We produce a lot of mixed media signage and custom displays, along with logo design, visual marketing materials, and true company branding.
In the world of business, though, it can be really easy to lose one’s self in the work—to forget that art is made for entertainment and the elation of creativity.
Here at GrafiXhouse, we love to have a good time and bring enjoyment through our art, to remember the fun behind the function of what we design.
When a customer approached us to create a sign that would take an inside joke and turn it into a vibrant, dimensional piece of art, we were happy to oblige.
Living the High Life
The customer wanted a fun sign for his lake house that played off an inside joke, which we were not told. (Therefore the joke would no longer then be an inside joke, natch.)
The only design criteria we had to work with was using the name “Whitaker,” the phrase “Living the High Life,” and a 40-ounce Miller beer bottle.
We decided to play off the colors of the beer itself, as well as its distinctive label. We wanted to evoke the feelings one gets relaxing and enjoying each other’s company at the lake while, at the same time, also creating a fetching piece of art for the customer.
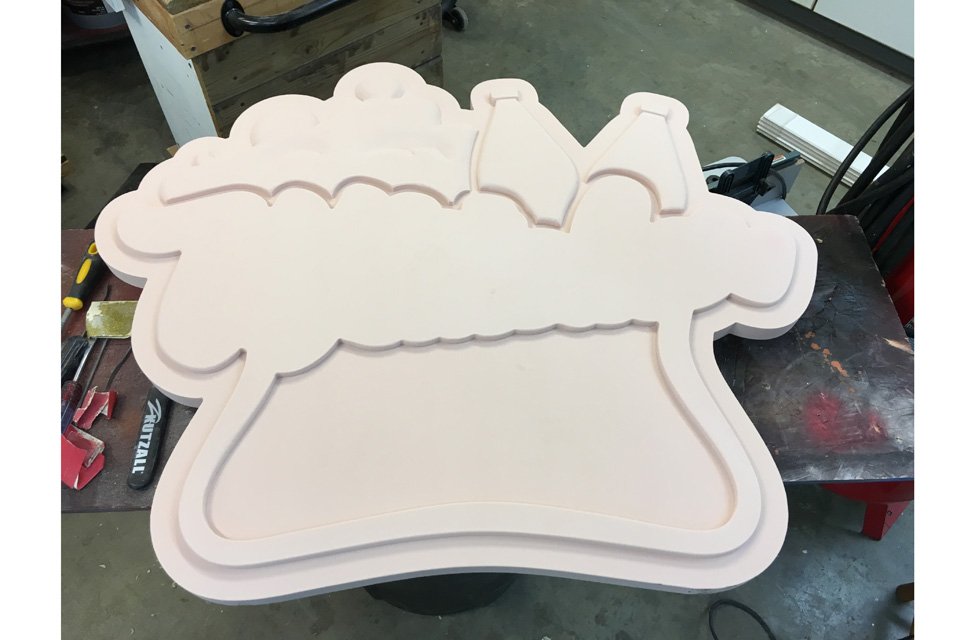
As with all the projects and designs that we create, we used pencil and paper during the brainstorming process before bringing the drawings to life on the computer. We will show this idea to the customer, and after they approve, we then begin the routing, shaping, and priming processes.
However we weren’t sure how we were going to shape this particular sign. The only direction we were given by the client was that he wanted a hand-carved, hand-painted look.
We decided to use 15-pound Precision Board (PBLT-15) high-density urethane (HDU). I knew Precision Board would be able to route and shape well, as well as offer depth without the weight.
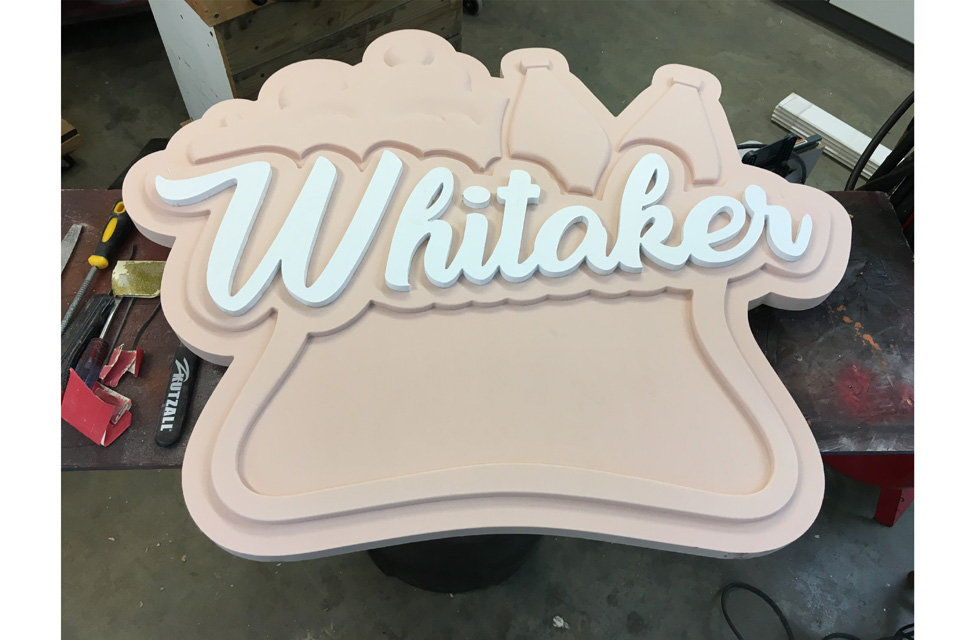
We opted to do an aluminum composite material insert for the “Living the High Life” phrase; this would not only add a different media to the sign but also place more emphasis on the phrase since the “Whitaker” name above it was going to be so big.
To start, we routed out the rough shape of the sign with our ShopBot PRSalpha CNC router. We then used rasps and sandpaper, as well as a bandsaw and a RotoZip rotosaw, to shape the bottles and foam by hand.
We used the ShopBot router to also precisely cut out the “Whitaker” letters. We ended up attaching them with pins pressed into the HDU along with some application of Gorilla Glue®.
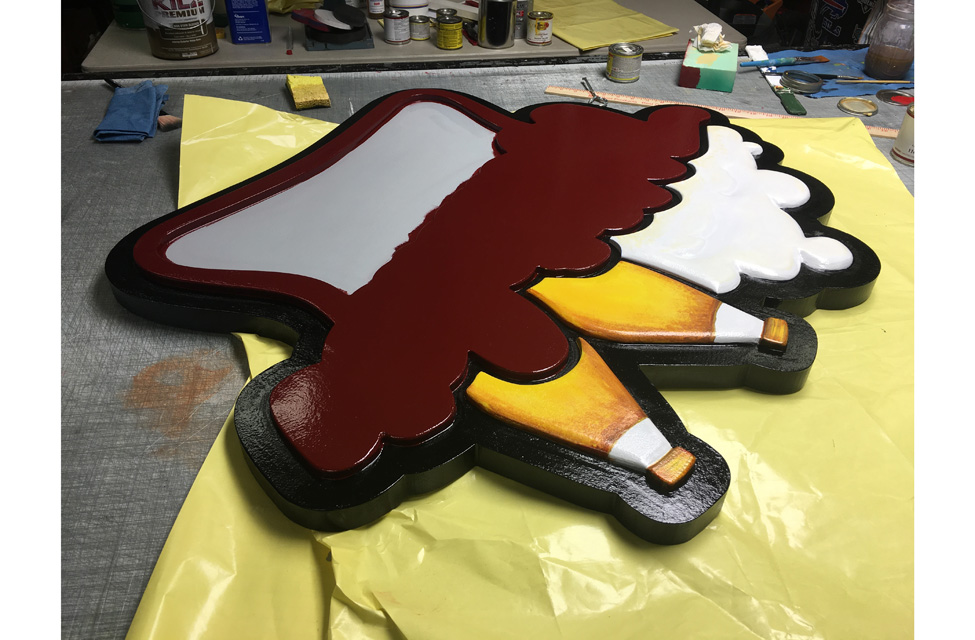
Once we completed the shapes, we primed the Precision Board and gave it a top coating. (Note: Before we primed anything, we first applied SealKrete sealer to the raw Precision Board.) We hand-painted the entire sign with Ronan and 1-Shot lettering enamels. Although we do airbrushing here in the shop, we used regular brushes for this project.
We made the sign with the original intention that it would be installed onto the front side of a lake house. So we crafted a metal French cleat and attached it to the back of the sign. However the owner loved the finished sign so much that he decided to bring it instead into his living room and show it off as a piece of art.
In the end, we were able to create a mixed-media sign full of life and color that served to remind not only the customer, but also us, that sometimes you need to step back and enjoy the high life.

Mementos of Railroad Spikes
Another fun project for us started when a customer came into our shop and asked if we could make something personal as a memento present for his twin grandsons. He mentioned that they really loved trains, so he had brought along two actual railroad spikes with him and told us that he wanted to incorporate them into a finished design of some kind.
Both of his grandsons work in corporate offices but in different cities; so our customer’s idea was to create two identical pieces featuring the railroad spikes that they could display at their job. He was thinking something along the lines of paperweights or conversation pieces that could be placed on their desks.
The grandfather wasn’t really sure what he wanted as a finished product. After some back-and-forth discussions, he casually mentioned maybe laying the spikes on their sides and then us painting the name of the grandson on the spike.
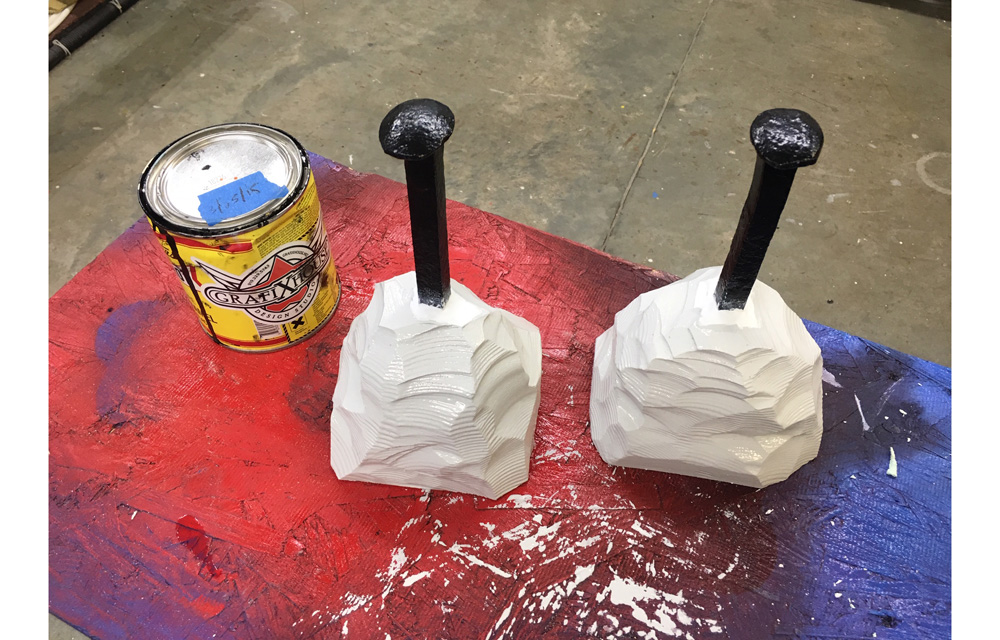
Since there are always rocks found along railroad tracks, we thought this motif should somehow be incorporated into this project. We knew we would be able to create the rocks out of Precision Board HDU. I thought it would be cool to base the design off the “sword and the stone” legend from King Arthur, so we decided we would “drive” the spikes into the Precision Board rocks.
The spikes given to us were pretty heavy, so we used thirty-pound Precision Board here. We really needed the weight so that the spikes would be held upright in the finished rock pieces.
I ended up using a bunch of scrap pieces of Precision Board lying around the shop to craft the rock textures. Again I like to use Precision Board because of its ease of tooling.
On this project, I only had to use an angle grinder with a very aggressive sanding disk. I made sure to wear leather gloves while holding the Precision Board rock in my hand, in case the grinder skipped or slipped off the piece. (Note: I wouldn’t recommend this process for everyone because, hey, I like to live on the edge!)
Once all the faux rocks had been shaped and clamped together into one giant piece with Gorilla Glue®, we treated the Precision Board HDU with SealKrete and then primed it with all-purpose Kilz.
We drilled a hole into the top of each piece and hammered in the spike. I used Magic Sculpt® two-part epoxy clay to fill in the hole so we could paint it.
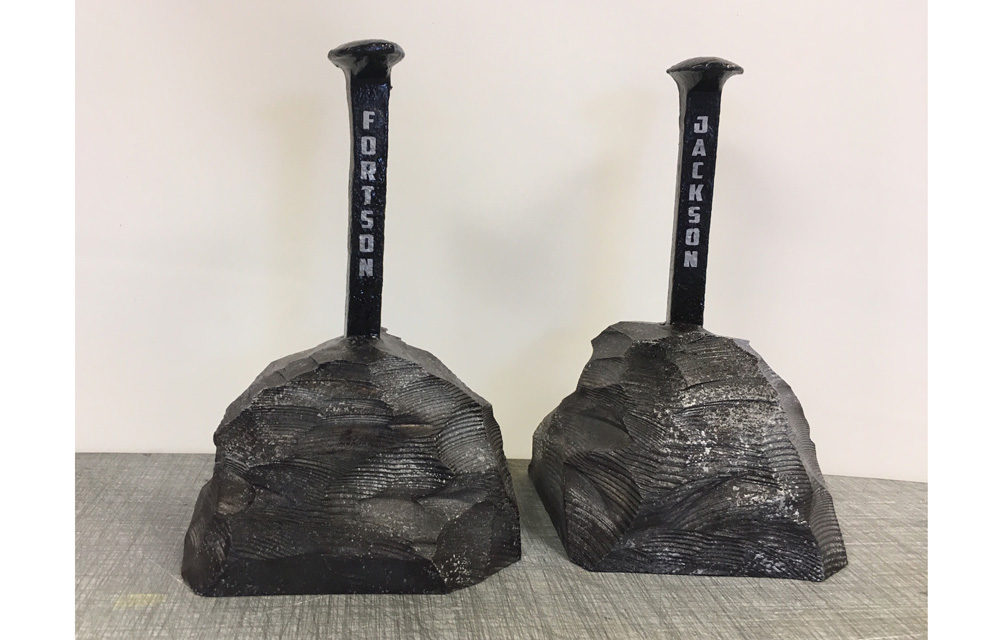
One of our artists, Stacy, has a real knack for painting. She painted the rock pieces using Testors metallic model paint and 1-Shot. The metallic paint was employed so that every time someone would pass by the rock, they would see a certain shine or shimmer (like rocks one would find on railroad tracks). She had both the rocks, the steel spikes, and the grandsons’ names painted within an hour.
The finished pieces stood eight to nine inches tall, and our client was all aboard with our attention-grabbing solutions.
—Steve Kolacz
Steve Kolacz is with GrafiXhouse Design Studios. Steve can be reached at (919) 329-5743. Portions of this article previously appeared as a featured blog hosted by Coastal Enterprises, manufacturers of Precision Board HDU, and appears in the October issue of Sign Builder Illustrated magazine.


